The Sub-Accounts Tab
Written By Sinan Murat
Last updated About 2 months ago
Overview

The Sub-Accounts tab is where you go when you want to look at individual accounts rather than your overall numbers. It lists every sub-account you manage, along with their adoption metrics, so you can compare performance and take action where it's needed.
Highest and Lowest Engagement

At the top of the tab, you'll see two lists side by side:
Highest Engagement - Your top 5 most active accounts
Lowest Engagement - Your bottom 5 accounts
This is a quick way to see who's thriving and who might need a check-in, without having to scroll through the full list.
The Accounts Table

Below the rankings, the main table lists all your sub-accounts. Each row shows:
Account Name - Click it to see that account's feature-by-feature breakdown
Plan - The account's current subscription plan
Priority - A star icon you can click to flag important accounts (more on this below)
Assets - How many assets the account has created
Active Assets - How many of those assets are properly set up
Engagement - Total activity count for the selected time period
Time Spent - How much time users have spent inside the platform
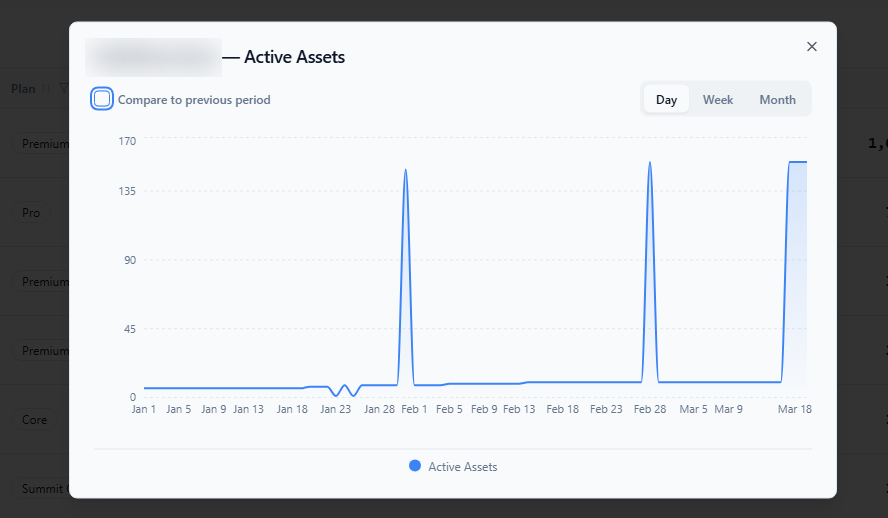
You can click any of the metric values (Assets, Active Assets, Engagement, or Time Spent) to open a chart showing how that number has changed over time for that account.
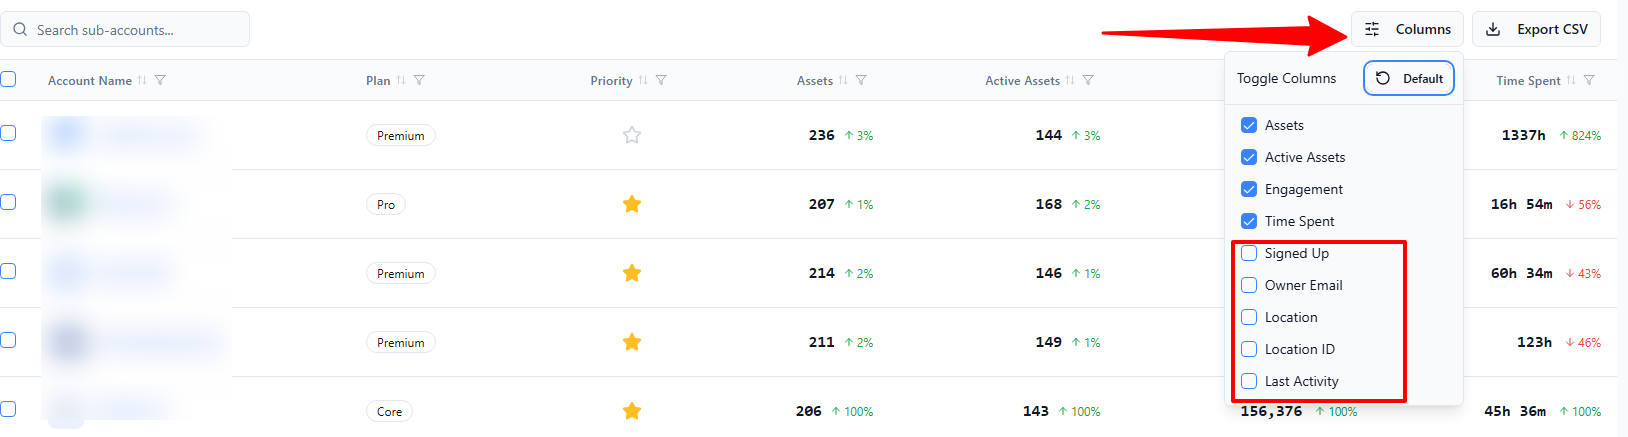
There are also additional columns available - like Sign-Up Date, Owner Email, and Last Activity - that you can turn on from the Columns button at the top right of the table.
Sorting and Finding Accounts
Click any column header to sort the table by that column. By default, accounts are sorted by Engagement from highest to lowest. You can also use the search bar to find a specific account by name.
Use the page size selector at the bottom to show more accounts per page (10, 25, 50, or 100).
Flagging Priority Accounts

Click the star icon next to any account to mark it as a priority. The star turns amber when an account is flagged. This is useful for keeping track of accounts you're actively working with or monitoring closely.
Taking Action on Multiple Accounts
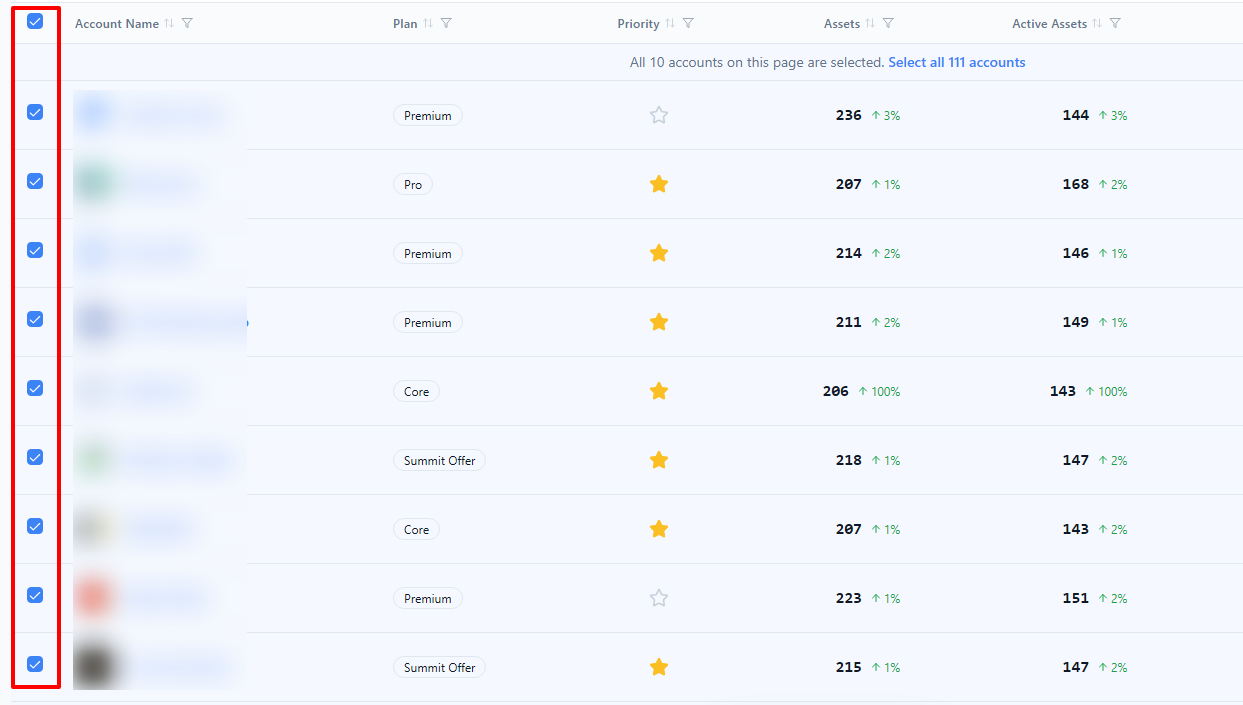
You can select multiple accounts using the checkboxes on the left side of the table. Once you've made a selection, an action bar appears at the bottom of the screen with the following options:
Trigger Workflow - Choose a workflow to run for all selected accounts at once. This is helpful for automating outreach or onboarding steps.
Request Feedback - Coming soon.
Clear Selection - Deselects everything.
If you want to select every account (not just the ones on the current page), a banner will appear with a "Select all N accounts" link after you check all visible rows.
Exporting Your Data
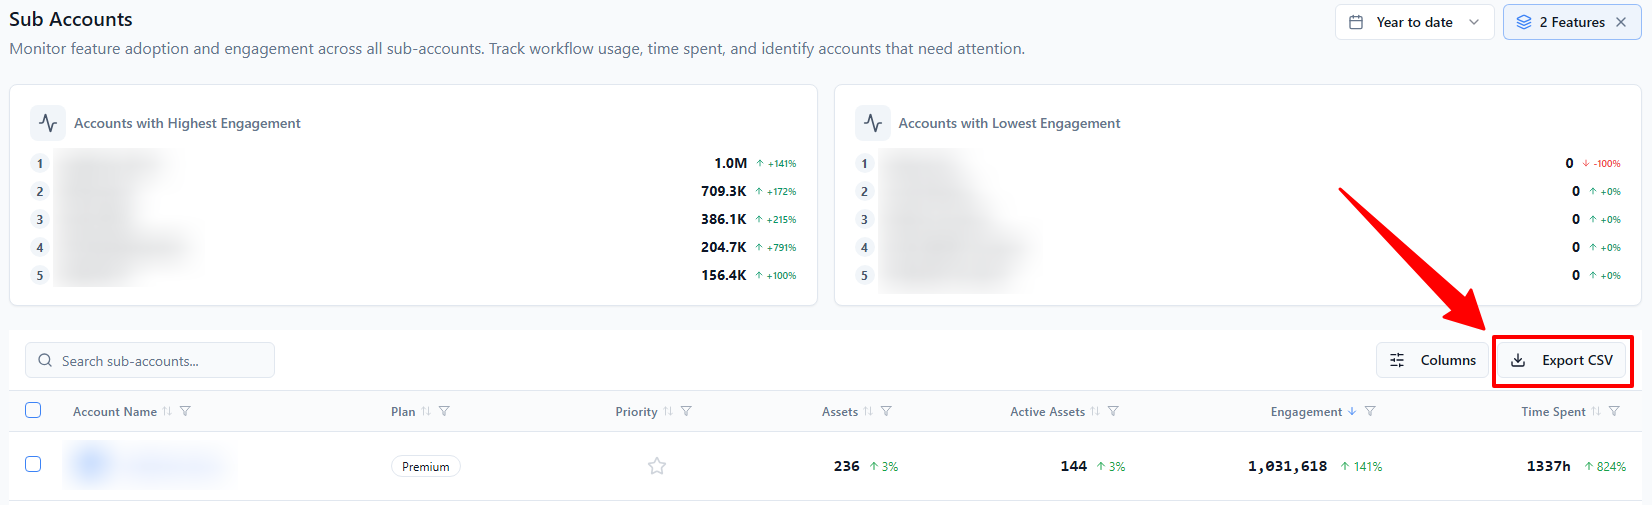
Click Export CSV to download a spreadsheet of all accounts that match your current filters and time range. A confirmation message will appear once the file is ready.